The day has finally arrived: Microsoft is now rolling out Windows 11 to supported computers globally. Some brands like ASUS said that they will begin the rollout by now on a big chunk of their current computer portfolio. While the update is now rolling out to eligible laptops, not everyone is getting the upgrade notification as of press time. If you want to expedite the process, we’re here to help. In this guide, we’ll show you how to install Windows 11 in the Philippines without the need to wait for the upgrade notification to pop out via Windows Update.
How To Install Windows 11 In The Philippines
- Download Windows 11 Installation Assistant
- Make sure your PC fits the requirements
- Run Windows 11 Installation Assistant and download all necessary files
- Wait until the whole installation process is finished
Download Windows 11 Installation Assistant
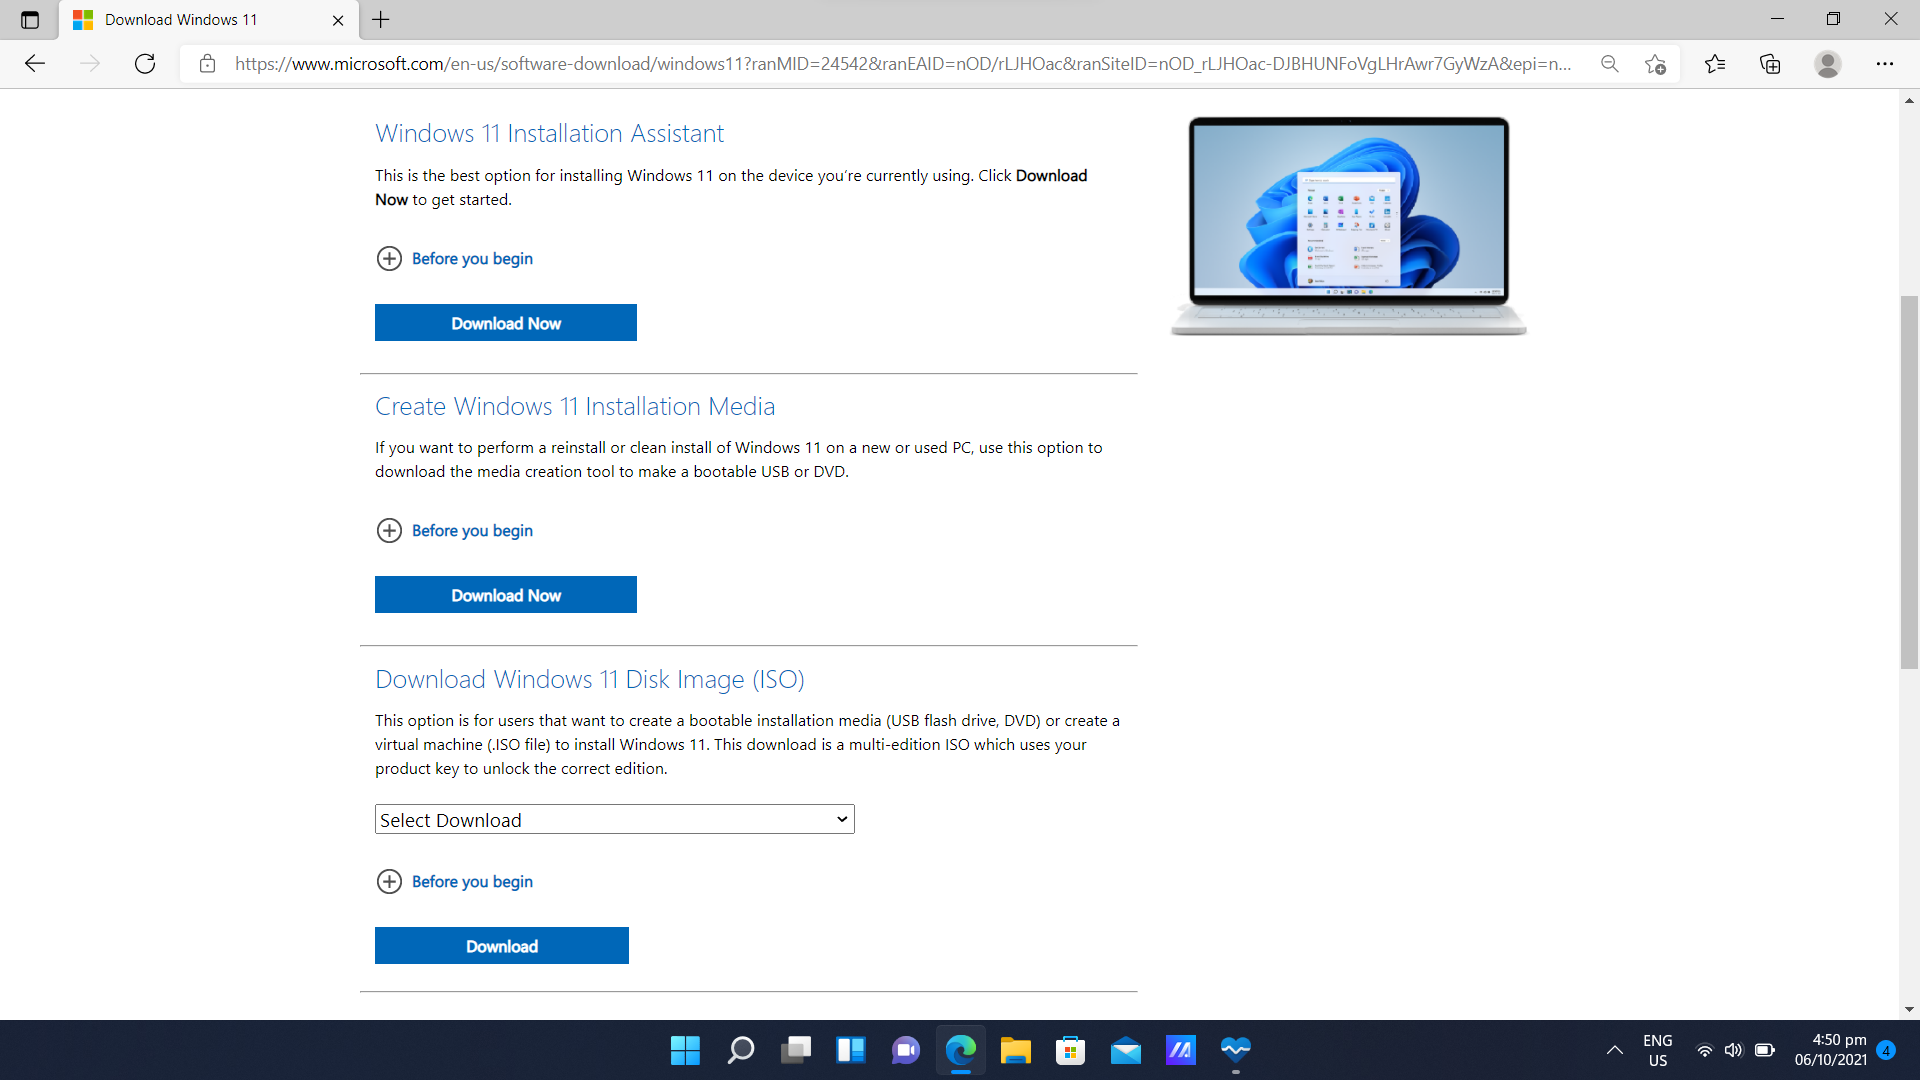
Installing Windows 11 is not that hard, as you simply need to visit this page to start things off. You are given two options: 1) using Windows 11 Installation Assistant IF your PC complies with Windows 11’s requirements; and 2) creating an bootable DVD or flash drive IF you intend to do a clean install or reinstall.
The third option, on the other hand, lets you create a virtual machine (.ISO file) that uses your product key to unlock the correct edition of Windows 11. For this how to, we will focus on the first option, which is to download Windows 11 Installation Assistant.
Make sure your PC fits the requirements
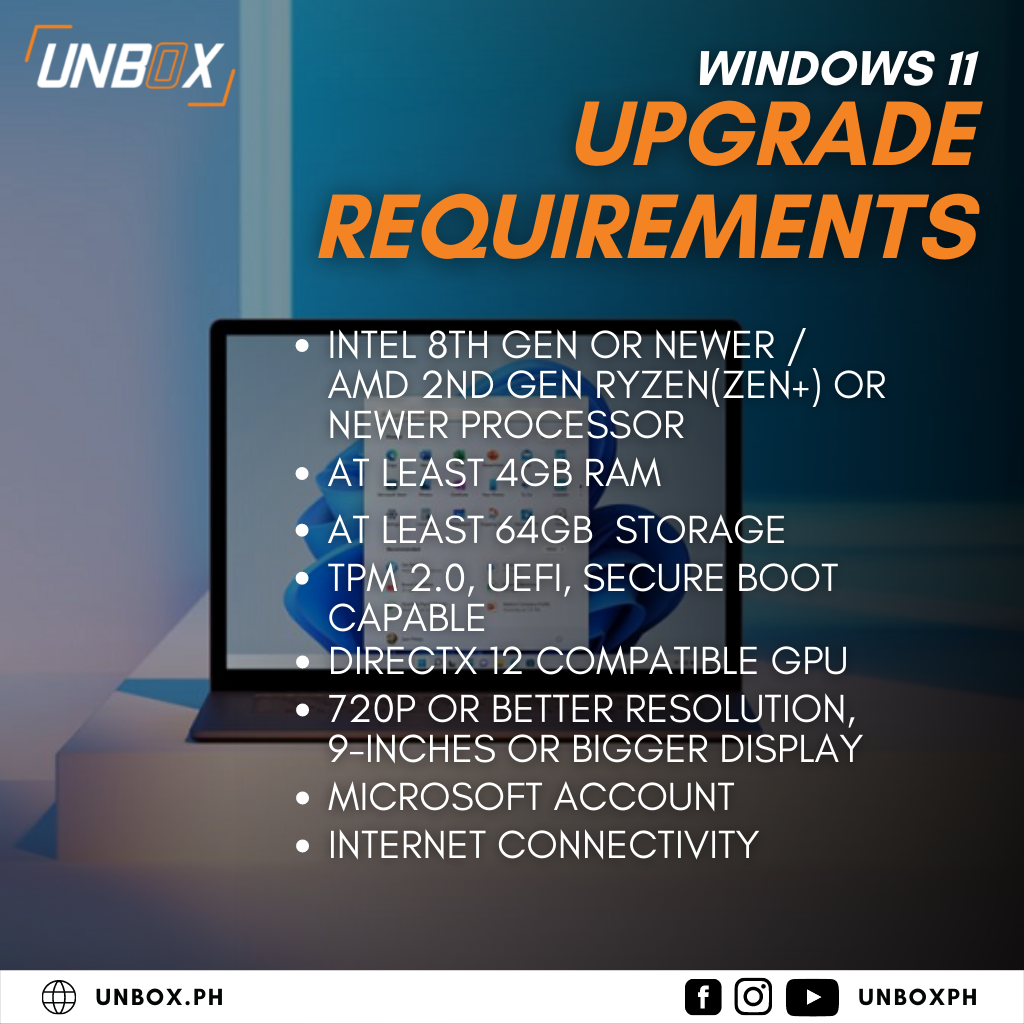
Before you get started, take note of all the minimum requirements for Windows 11:
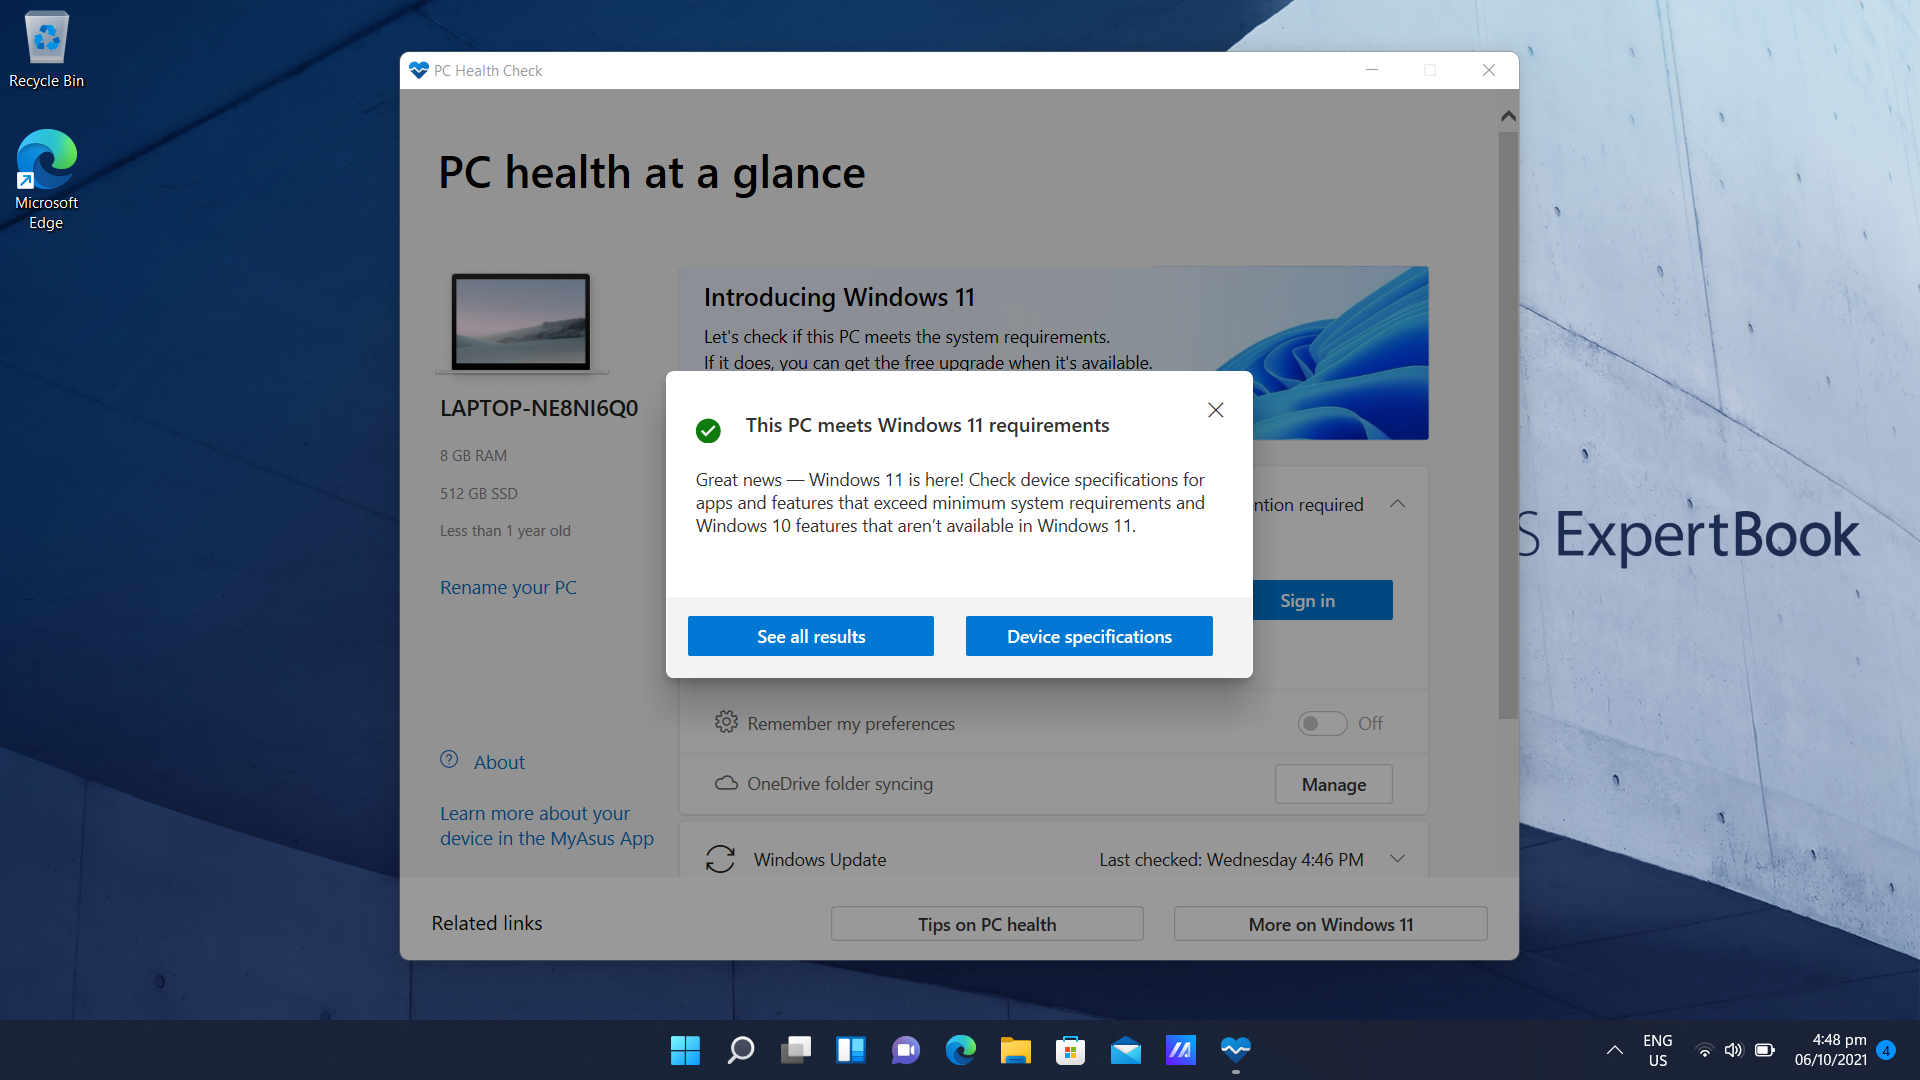
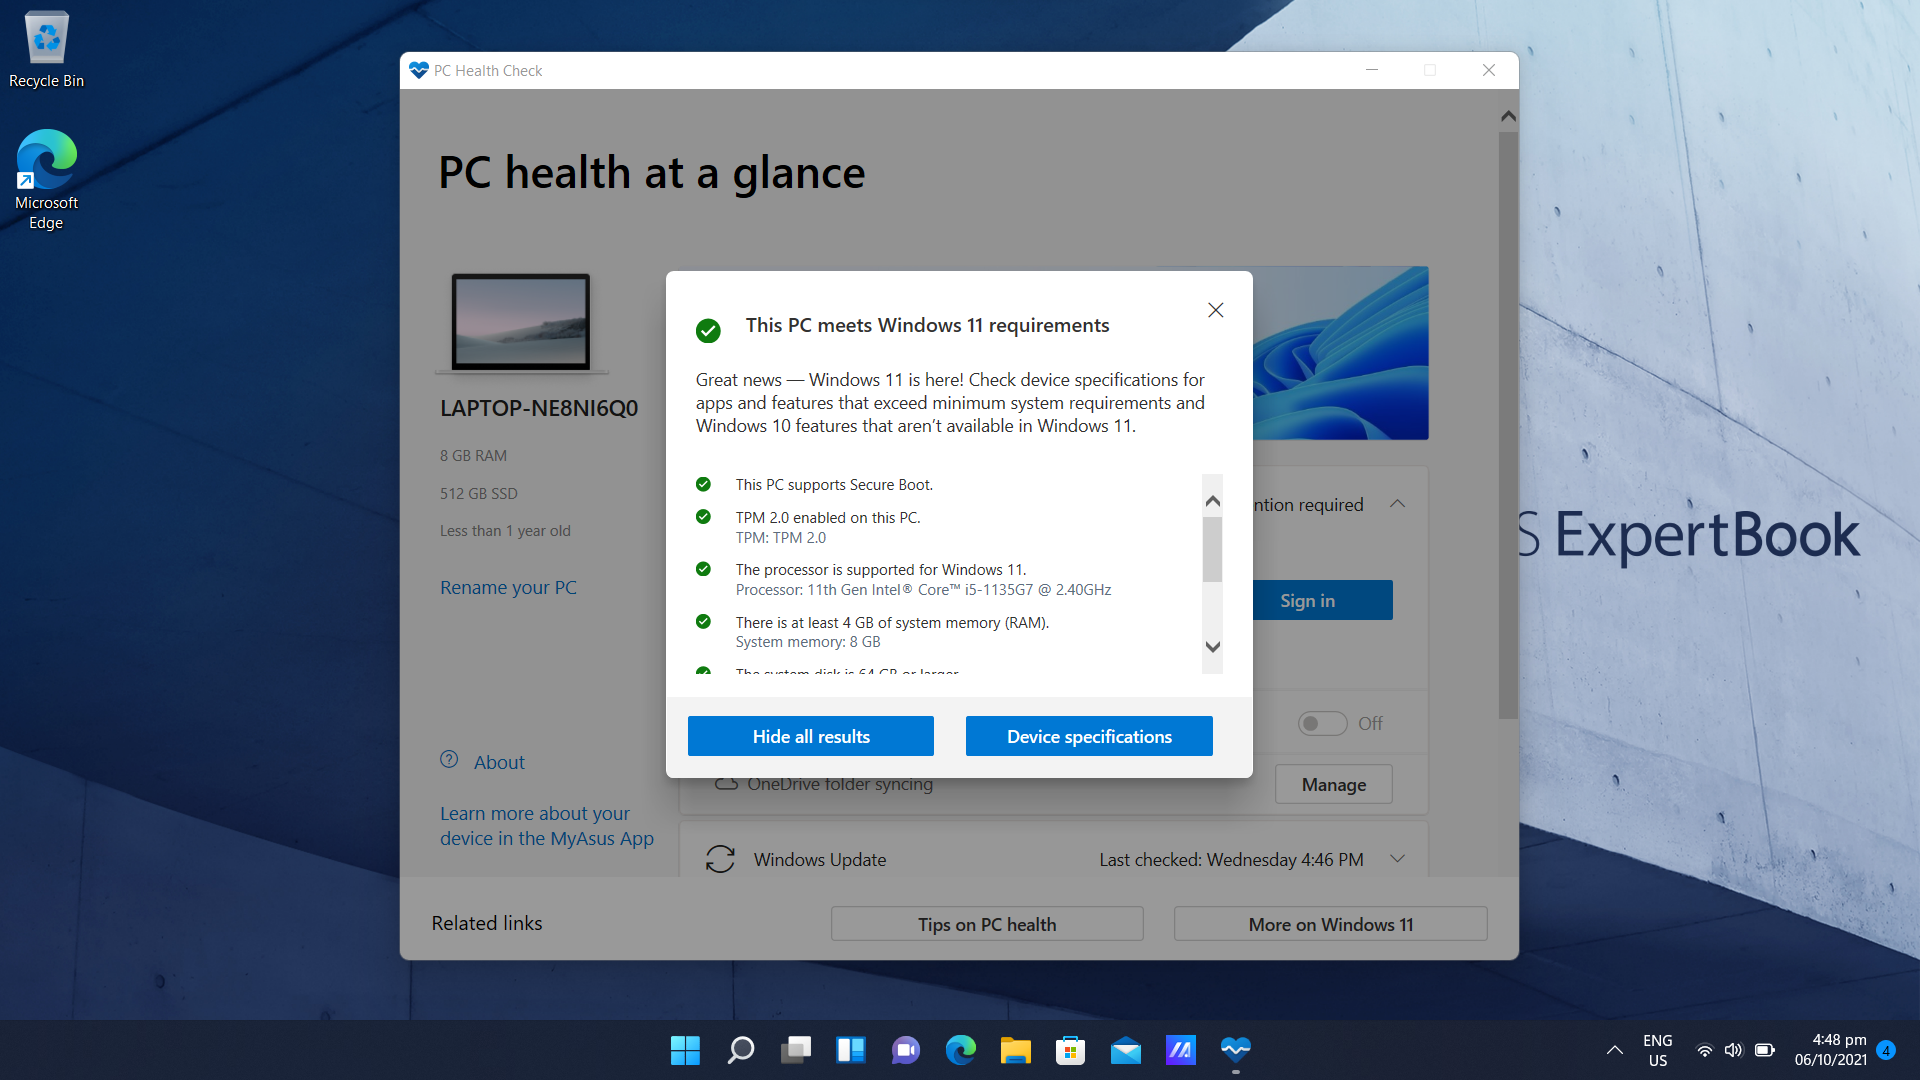
If you want to be sure, download the PC Health Check App to save you time, as the app will tell you upfront if your PC is ready for the software upgrade. Here’s what it should tell you if your PC is fit for Windows 11:
Before you start running Windows 11 Installation Assistant, make sure to have at least 9GB of free space on your PC.
Run Windows 11 Installation Assistant and download all necessary files

Windows 11 Installation Assistant downloads all the necessary files before you start the upgrade. The download times will depend on your internet connection, so it’s best to have a fast and stable connection. With our fiber broadband internet, it took us a little under an hour to download the Windows 11 installer and the necessary files.

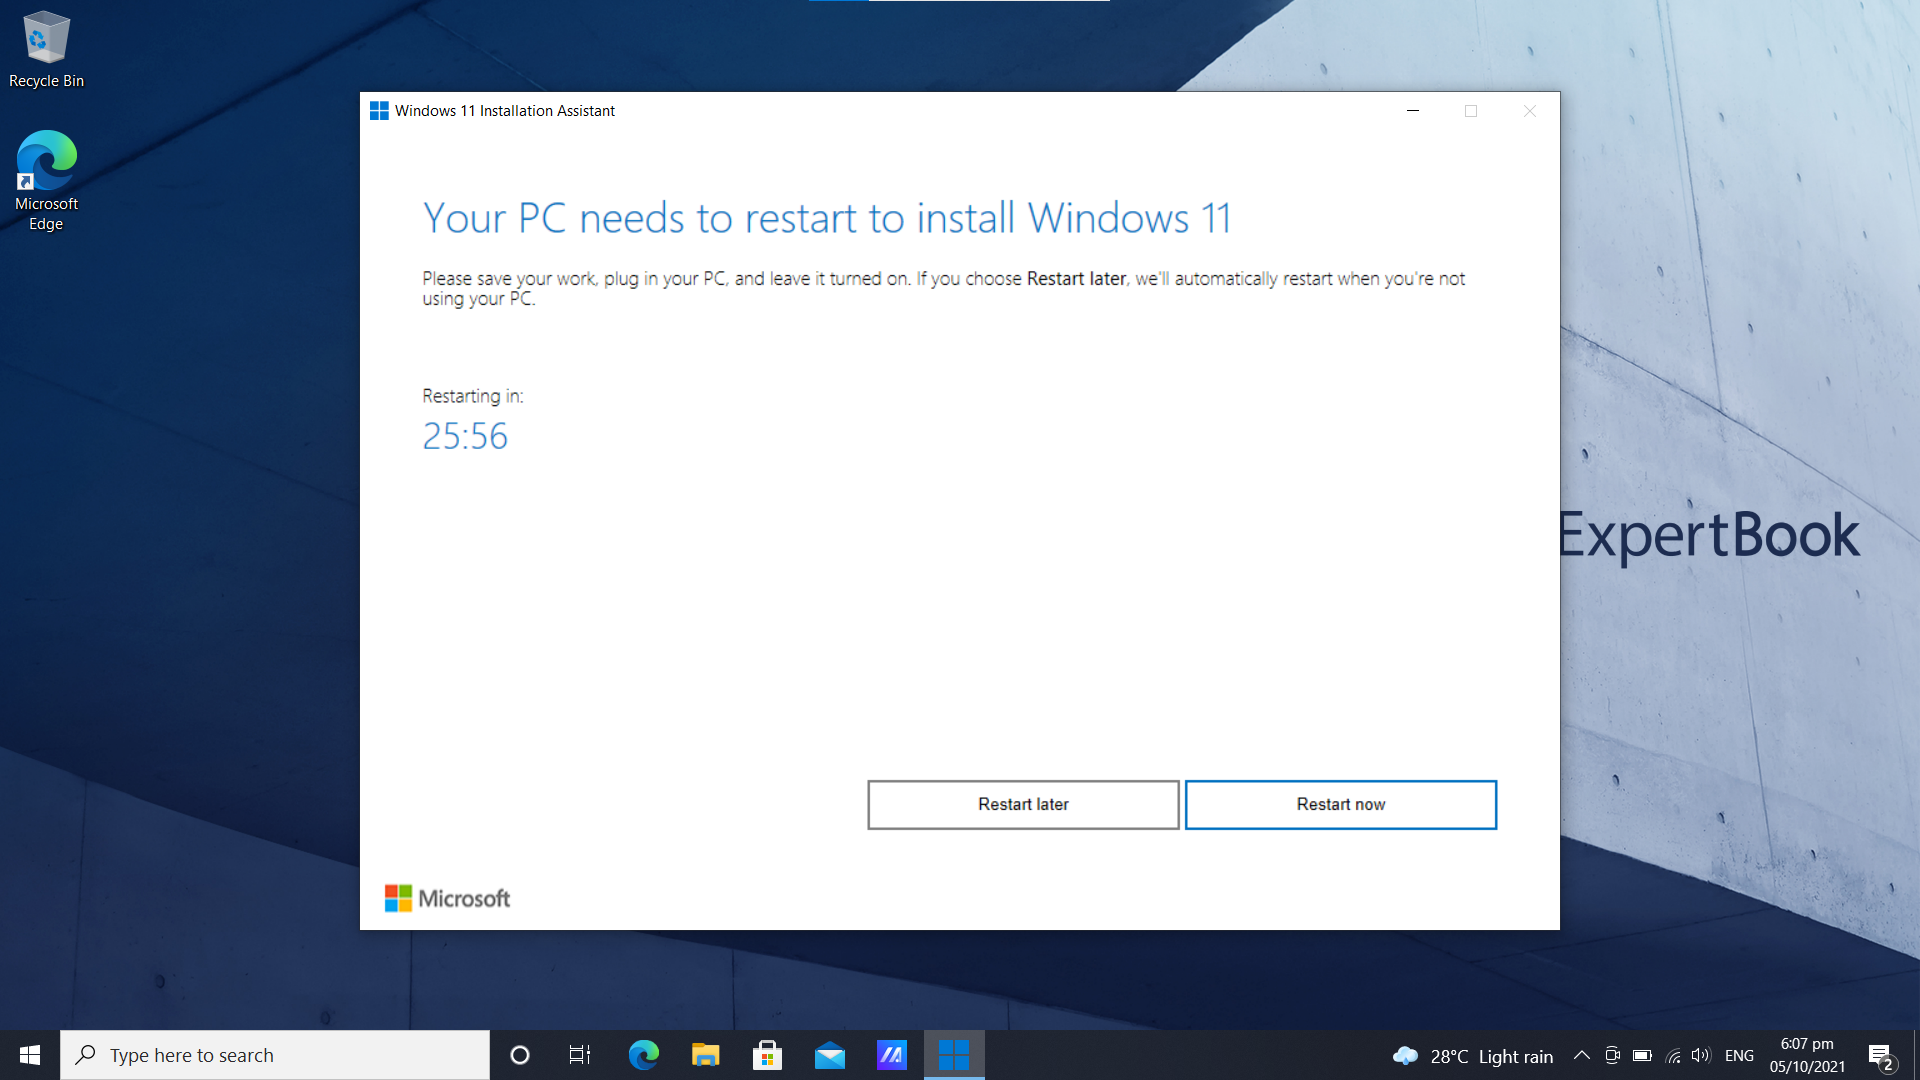
Once all files have been downloaded, the first part of the installation process begins. While you can still use your PC during this process, you have around 30 minutes (or less if you hit restart now after the status reaches 100%) after it finishes Step 3 (left screenshot) to save your work.
Wait until the whole installation process is finished
The second part of the installation process will involve rebooting your PC, and this part took us around 15 minutes. Once the whole upgrade process is finished–it took us around 30 minutes with the ExpertBook B1–we were greeted by Windows 11’s revamped UI, indicating that everything went smoothly. While we did not lose any files during the whole upgrade process, we strongly advise to back up all of your data before upgrading to Windows 11.
That’s it for our tutorial on how to install Windows 11 on your PC in the Philippines. The whole upgrade process is smooth, and we expect most (if not all) PCs to have the same hassle-free upgrade process as well.